Wednesday, February 29, 2012

The curse is definately over!

Just like the legendary curse of the Bambino that kept the Boston Red Sox from winning the World Series, my family has had a bit of a 'Bambino' curse on it as well.  If you've read my April post, "Sugar and Spice and Everything Nice" you'll learn that our family was in a bit of a drought when it came to having baby girls.  Don't get me wrong, we love all our baby boys... but a little girl once in a while evens things out.  Well, that curse was broken by my Nephew's baby girl born in June of 2011.  To prove that the curse is gone for good, a month ago my niece and her husband welcomed another baby girl into our family.  On January 25th, Elena [my mother's namesake] was born and I became a Great Aunt for the 7th time, this project is a gift to welcome her.

The project began like they all do, with a color scheme.  The baby's room was decorated with pink, green, creme and red.  I had some fabrics in mind for the next baby quilt from within the scads and scads of stashed fabrics in my bins.  However, for this project I wanted to choose fabrics that I didn't already have.  I wanted to try to mix a very traditional block pattern with some more modern looking fabrics.  I was very excited about each of the fabrics that I purchased for this quilt.  What I wasn't thrilled about was how they looked together when I 'mocked' up the petals next to each other.

I had arranged them on my cutting table and walked around them for days.  Kind of the way that you would if you were attempting to choose a paint color and you paint some wall segments and then see how it is to live with that color.  I knew I wanted to use the same block design as last Novembers' 'Dresden' block of the week.  I was counting on the pointed 'petal' look to create a field of what would look like flowers.  Only trouble was, when I put all 4 fabrics together I hated the result... It just looked like I was forcing fabrics and prints that didn't work very well together.


 I know it seems simple and obvious but I had in my head that the 20 petals would be created with a repeating pattern of these 4 fabrics.  I put them in every possible order and stared at them forever until the light bulb turned on over my head and I decided to separate them and create two different Dresden plate designs; one pink and one green to complement each other.


By separating the fabrics into two color schemes I also had an automatically defined layout for this quilt top.  Kept this design very simple since the prep work for each 'petal' as far as cutting, assembling and stitching them down onto the background colors has a bit more steps then usual piecing.

For the green 'flowers' I edge quilted the petal points and for the pink I quilted the straight lines ('stitch in the ditch' style) onto the background color and for the points I hand stitched them down.  I hadn't planned on using different methods for each color, but I think the result adds interest. 


I had planned on finishing this quilt off with a satin binding which I think would work out great for a baby quilt.  Then I remembered that baby quilts get a lot of baby messes on them and as a result get washed a lot.  I wasn't certain how satin binding would hold up as opposed to cotton so I stuck with a rolled one sided cotton binding extended from the back of the quilt.

More in-process photos and the finished project can be found within "Quilt Gallery 2".

Saturday, December 24, 2011

Christmas Sewing and the Dreaded Triangle


Each year I do at least a few Christmas sewing projects.  This year for teacher gifts at Jason's school I did 2 different designs, a wreath and a Bethlehem star using a lot of the same blues from last Christmas' lap quilts.  This year I made the star as a medallion alone and presented it as a wall hanging instead of a full quilt.  I didn't bore you with photos this time as the fabrics were mostly the same as last year's star(s) and what I was most excited about this year was the wreath design.

I had been wanting to do this patern for a long time, but I will admit, I hate cutting and sewing triangles.  If there is any way to turn a traditional triangle assembly method into a strip piecing project within a quilt pattern, I'll go that way every time.  As a quilter, of course, triangles can't be totally avoided.. how many log cabin quilts can a person sew before they loose it all together?

So, for this project I chose to find a way to strip piece the pieced triangles.  Now, I'll admit, this way is somewhat wasteful on the fabric as you do cut away a bit of scraps.  I also realize that I could cut and sew only on the triangle sides that are not bias cuts.  However, there are two things that I feel  you avoid with this method; first, the stretching of the triangle when the fabtic is cut on the bias [a cut 45 degrees cross grain] and the tiny points of the triangle getting sucked into the needle well of the machine, which is very frustrating and makes for a messy point on your triangle.

 
Getting started with this one, as any was picking fabrics and plotting my plan in my notebook.

This design is not mine, I took the wreath from another patern and adjusted it by omitting parts of the patern and adding a boarder.


Since I strip pieced this one I had selected fabrics and mapped out each pieced 4 triangle block and then cut stips for piecing


 .
Once I had the two fabrics for each side of the pieced block I then created 4 patch squares and cut the points to orient them into 4 patch triangles vs. 4 patch squares.  Thsi did feel like I was cheating, but the resulting blocks have centers with points that match perfectly and no distorted corners.


I continued this technique for all of the pieced squares.


The only thing to do from here on was the finishing.  Layed out my components, double checked my placement of the pieces and built a wreath.


The photo of the finished wreath may not show it well, but I used the meander method of quilting in the field of the wreath itself and then simply 'stitch in the ditch' quilted the boarder and binding.

This was a really simple project that, I think, has a really complex look.  I think that Jason's teachers really appreciated the gift and will hang it in their homes each Christmas...

Now to treat myself to one for my own Christmas decorations ... Merry Christmas!

Wednesday, November 9, 2011

Dresden Plate - 11/09/2011 - Block of the Week


I haven't been sitting at my sewing machine all that much lately.  I do have a few projects lined up but finding it difficult to carve out the time to put other things aside to concentrate on making much progress.  Not to mention that my fabric cutting table has also become the homework, craft & model making table.  So this week I decided I'd (literally) sweep away everyone's crayons, worksheets and pumpkins full of Halloween candy to create a one block project as a practice and to try a new design or technique.  Call it my 'Block Of The Week'.

This one is in preparation for a quilt project I have in the planning stage.  Sticking with a traditional quilt for this one, so not much creative designing to do, just fabric selections and prep at this point.  The design is a very old and traditional block called a Dresden or a Dresden Plate.  I've been wanting to plan a Dresden Plate quilt project for a long time.  I tend to like the designs that have an interesting history or that just look old fashioned.  I also like the look of reproduction or vintage look-a-like fabrics.  Those types of fabrics work well with this design, as in the Double Wedding Ring design.  Like the double wedding ring, this quilt pattern is another from the depression era of quilting, possibly earlier but it is a great example of a popular depression design.  The reason for that is due to the fact that many small cuts of fabric are needed, so for a time when large bolts or yardage of fabrics are hard to come by quilters would use scraps of fabrics that are easy to obtain... old pieces of clothing, cotton dress fabric, etc. 

The Dresden Plate block is characterized by a flower-like design of wedge shaped pieces of fabric fashioned in a circle resembling petals of a flower.  There are a few variations on the shapes of the petals as they can be cut straight across, in an arch or in a point, as I have done here.


This Dresden is a sample, so the fabrics are somewhat obnoxious and the thread used would not normally be white.. as you can see it sticks out like double trimmed seam of a 1970s leisure suit.


Some quilters choose to use a nylon mono-filament thread for the top quilting of the petals here as it is clear and would be the best way to hide the quilting. In this case I was not so much concerned about that as I had only two objectives; (1) create my first Dresden block to practice for the next quilt on my table and (2) try out the new "Easy Dresden" ruler that I bought for the project.


This ruler is an awesome product and I highly recommend it!  I'm sure that there are some who think that using the ruler template for the fabric cuts is cheating... well those hard core quilters can be my guest and sit at their cutting tables painstakingly cutting 20 petals X 24 plates in perfect 16 degree angles. If I were using those hand cutting, and hand quilting methods I would never see a project completed.  I'm very much someone who needs to see regular progress to remain motivated.  Time savers like this ruler are great ways for busy people to continue to enjoy these types of hobbies. 


One major reason I like this ruler is the technique that they recommend for making the points at the top of the petals.  Another ruler I purchased was more of a template that had a point on it that you cut and then to make the edges finished you folded over your 1/4 inch seam allowance.  This method recommends you cut the wedge, the same shape of the ruler, then fold in half longways, with right sides together and sew straight across your 1/4 seam allowance.  When you then turn the seam back and press you have a finished edge.  This photo shows the back side of the point that is created as a result of this step.

I know this photo is a bit blurry, but you can see here the back side of the points.  This is a quick method and doesn't require any folding over and pressing of that edge as some other instruction and other templates suggest.
I chose to assemble the Dresden in sections.  There are 20 petals in this design so I broke that up into 5 fabrics that repeat 4 times.  I suppose I could have tested out my ability to align fabrics randomly, but we all know I'm terrible at 'random'... so for this practice I stuck with repeating, predictable, fabrics.


 Another interesting tip that makes this pattern easier is the time saver offered for the circle in the center of the petals.  The suggested method here is to cut a circle the size of the middle fabric, cutting your fabric slightly larger.  Then string a running stitch around the edge of the fabric and draw it up around the cardboard circle and press.  Cardboard works well here as it will withstand the heat of the iron, but my error was not using thin enough cardboard.  I used cardboard from the bottom of a Poland Springs case of water, not exactly corrugated cardboard but still think and sturdy.  The fault I found with that was that the circle was kinda sloppy.  You can see in the finished photo of the block that it isn't quite round.  I think that cardboard from maybe a cereal box might work better.


This is a real fun block to create and somewhat fast to build.  Once fabrics are selected and cut, I'd say this is a one week or even a weekend quilt project, at least quilt top completion.  Be on the lookout for a quilt project with this block from my quilt table within the next month or two.  Next week I think I'll do a few stars for my block of the week getting ready for Christmas.

Saturday, September 10, 2011

Brown Bear, Brown Bear...

Fall is here again and again the dining room table that I have commandeered to be my official quilting station is coming alive with the sounds of my sewing machine.  Next to my sewing station, my cutting table is covered with fabric scraps and fat quarters and the little piecing ironing board... It's official... I'm getting that feeling, that excited feeling that some people get when they just can't put their favorite novel down and pick it up each night as they can't wait to see what happens next.  It's like an obsession.. I get excited about the fabric I hunt for and find, I create the plan, color choices, arrangement of fabrics and patterns.. something about it is very addictive to me.  I'm excited to have sewing season back.

I feel like the last 3 months went by in a blur.  Since there is no air conditioning in my house and sitting in my sewing room in the summer is like sewing on the surface of the sun, not a lot of sewing got done in the last few months.  I hoped that this summer was a good time to bring my machines for any repairs that they needed, clean outs and timing tune ups.  Sadly, I have given up on my Jenome quilting machine ever sewing a back stitch again.  After having 3 different technicians pull it apart and try to fix the switch that reverses the stitch direction I stopped short of sending it directly to Jenome [for $58 shipping charge each way] for one last try for repair.  I cut my losses and picked it up at the repair shop still broken figuring that I'll perhaps save it to use for a straight stitcher on a small Grace frame... that is, once I can pull together the money to purchase a quilting frame or decide where the heck I can find the space to set one up.  Luckily my Singer backup machine [which has now been promoted to my main machine] is working like a champ after a good clean out, timing and tune-up, oiling and a quick fix to a small problem in the bobbin housing... so the machine is poised and ready to go.

The first quilt of the season is complete and ready to be wrapped as a gift for a baby shower that I am attending on Sunday (tomorrow afternoon).  This project is for my niece Beth's new baby, Tommy, to be born late October. 

I had an idea a while back to find a classic children story or book and build that into a theme for a baby quilt.  I had in my mind something like 'Make Way for Ducklings' or 'Where the Wild Things Are'.. but then last year Jason's kindergarten class had a week or so where they celebrated the books and art of Eric Carle.  That gave me the idea for this theme.  It was a fun color pallet and best of all I did some searching and there were a few options online that I could find for themed 'Eric Carle' fabric.  The obvious choice was either 'The Very Hungry Caterpillar' or 'Brown Bear, Brown Bear What do you see?".   The colors and all the different animals in this fabric won out and I chose the Brown Bear.

I had done a character quilts before and a novelty square quilts with themes but never created a theme out of a book or a style of illustration.  So I started with a plan / map of what I was able to dream up and headed to the cutting table.  For this quilt I chose not to consult a pattern as I knew I wanted it to look like it had motion and be playful with color.  I was lucky to be able to use up left over colorful fabric that I had previously used for the Kindergarten quilt last spring for Jason's teacher.   The fabric was a perfect match and looked to belong with the licensed fabric I purchased. 

This quilt was also quilted using a method called 'meandering' or a 'meandering stitch'.   I usually quilt using a method called 'stitch in the ditch' which is where you attempt to hide the quilted stitches in the seam of two quilt blocks or pieced shapes.  The meandering stitch is when you lower the feed dogs (the teeth that pull the fabric through the machine) so you can freely move the fabric around by hand, you use a special foot and 0 stitch length and you move the fabric in a random pattern of large swirls.  This was a first for me and I really love the way this finished the quilt, the feel of it and the effect you get is great.  However, it was a bit harder than I thought... reminded me of learning to swing a golf club... legs shoulder width, elbow up.. back straight, butt out, follow through.. there is about dozen different things you have to remember and do.  With meandering quilting you need to maintain a steady controlled speed of the machine with your foot and with your hands maintain constant movement of the quilt being certain not to make any sharp lines or stops as they will stick out over the other quilting and also make sure you don't cross over other lines... all these factors together will controls the stitch length which you do not want to see variations.  Now, I am certain the quilt police are not going to do a raid on my quilting room looking for inconsistent length in my meander stitch or if I sewed over another stitch.. however, I would like to try to get it as right as possible.

In progress and completed quilt photos here Quilt Gallery 2 .

Overall I'm really happy with this project.. I think it will make a cute quilt for the baby's room and of course I couldn't resist coupling it with the book that inspired it and a little stuffed Brown Bear.


Thursday, June 23, 2011

Doggone almost long gone...

No stitchin' tonight.. this post is entirely of the other variety...  This post is for any parent who has ever had to rush to the pet store while their child is at school to find a suitable hampster doppelganger or has stood in the bathroom with the family surrounding the toilet playing taps on the kazoo while a goldfish swirls down to his final resting place or have had to post fluffy's face on the telephone poles under the word L-O-S-T.

There has been no sewing this week.. and I really don't watch much TV, so on these nights when I do sit on the sofa and try to pay attention to the programming that Glenn watches I often find myself sound asleep within minutes.  Tonight was one of those nights, my eyes opened on the sofa at around 12:45 AM.  I hate that for a few reasons; one is that I just can't stand the thought that all that time I sat there was completely wasted.  I didn't work, I didn't clean the house and I hadn't sewn a stitch.  Another reason is that there are chores and things I need to do each night before bed and waking up slumped over on the sofa puts me in such a fog that I stomp around the house like an extra in the living dead movie series getting things ready for the next day and letting the dogs out one last time so they don't nudge me with their wet noses at 5:30 AM the next morning.  That's the very thing that went wrong this evening...

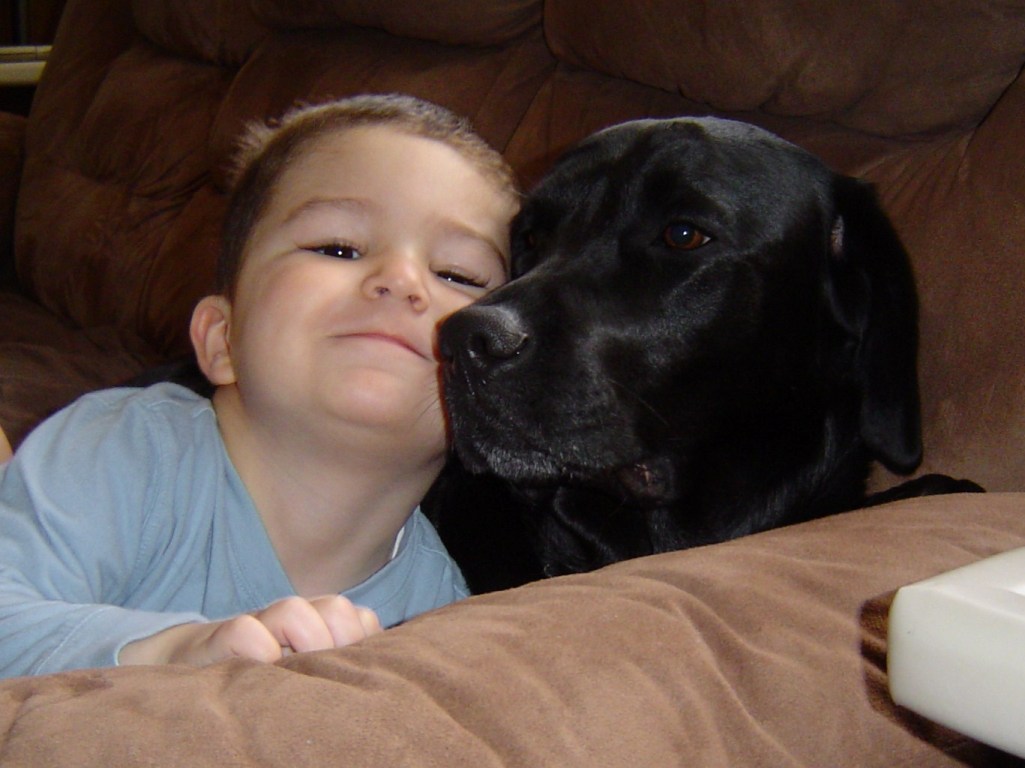
Those who know us know that our dogs are like real people to us, they're our family.  We have laughed many times when we look at each other and realize that we're all sitting on the living room floor while the dogs are nice and comfortable stretched out all over the sofas.  When I work from home Cinder (our female lab) lays under my desk, when I sew she lays under my table.. with either her paw or her snout resting on my foot.  My son has never slept a day in this house without at least one dog on the foot of his bed, when he was an infant Wiley (our male lab) used to sleep beside the crib, sometimes half way under it.  He and Cinder have had a love affair since the day we brought him home from the hospital.


Both dogs watch over him and he loves them so much, the three of them are one unit...


 ..... which is why it's 3:35 am and I am wide awake taking deep breaths and finally able to relax.   I'll explain...

I woke up, on the sofa tonight.. like I said, around 12:45 am.. not very happy to have fallen asleep.  I go into my son's room and wake Wiley up to tell him that he needs to get off the bed to go out to go pee before I go into my bed... he groans a bit, stretches, gives us a shake and starts his 11 year old lab lumber out towards the door.  I didn't need to wake Cinder up because she, at 7 years old, is still the most playful, friendly and lovable lab ever.. she of course is right behind me the whole time.  If I move.. she moves.. she will spring up from a sound sleep to follow me to the bathroom only to sit out side the door and wait for me... then wag her whole self when I open the door...she is ready and we all go to the back door.  And that is where it all goes wrong....

We have a fenced in yard.   The front facing the street is 6 foot high cedar board fence and the sides and back are 4 foot high split picket.  It is convenient because we can simply open the door, they both go down the deck steps and and kill the grass in their favorite spots.  Now, I should have known something was wrong immediately because Wiley happens to be the one lab in all of lab-dom who hates getting wet.  He loves to swim, but will walk like a cat that has paper bags tied to his feet in wet grass and will choose to stay in if it is raining out.. but not tonight... they both went out happily.. I figured they really need to go since I was late and usually let them out at around 10:30 pm.

Turns out I had failed to stick my head out in the rain to check the front gate which because of the wind and rain was wide open.  I closed the door, not knowing and went to get a drink of water and then went to wait by the door for them.. it was odd that they were not running back in for their last snack of the night... they are dogs with very strict routines.  But still... I waited.. Not seeing them for about 5 minutes or so I looked out the back window into the yard, I could see the whole yard with the flood lights on.. no dogs.... hmmm maybe they're around the side of the house... I go out in my bare feet, in the rain.. walk around to the side, still inside the gate.. uhhhh no dogs.  I then, on my way back to the door, looked at the gate and I instantly felt my heart drop... it was wide open and they were both gone.

I yelled Wiley's name.. and like someone caught in the act he pokes his head over to the open doorway where I can see him as if to say... "Huh? What?".  I scolded him for being out in the front yard and he happily trotted over to me with the promise of a piece of doggy chicken jerky, his favorite snack.  Cinder, however, was no where to be found.  I couldn't see her.. she is all black and it's 1 AM on a dark, rainy night... I can't hear her collar jingling... she's just gone.  I freaked just a little...  We joke around all the time that as playful and lovable as she is, she is equally daffy.. If she were a human she would be one of those super models who can't spell 'super model'... she's just a beautiful, wonderful dog.. but beyond 'Catch the Frisbee, love the humans' she's not got much more to offer.  She passed her obedience classes, she got her canine good citizen badge... she's just a poster child for not knowing enough to come in out of the rain... go figure.

So I run in the house, put some shoes on, grab a flashlight and an umbrella and figure I'd grab her up in the neighbors yard eating some gladiolus or something.... I walk one house away... no Cinder... I walk two houses away, no Cinder, I cover about 3 houses on either side of ours... no Cinder.. now I panick!  The very first thing I can think of is 'How am I ever going to tell Jason that I lost his Cinder!?!  His girl!!'  This boy loves that dog like crazy....


I was completely beside myself...  Glenn got in the truck.. drove all around the neighborhood, on the busy roads and couldn't find her.  I then took my turn on foot and walked around desperately yelling "Cinder Frisbee!!" something she just can't resist... and there she was... 3:20 AM.. jumping around in someone's yard like it's play time at doggy day care.... she bounded over to me.. I hooked her up and took her home.  Glenn and I sat there for an hour.. not able to sleep.. not knowing if we should be relieved, frustrated or frazzled.  In the meantime, there's Cinder.. right where she belongs, fast asleep on the sofa.
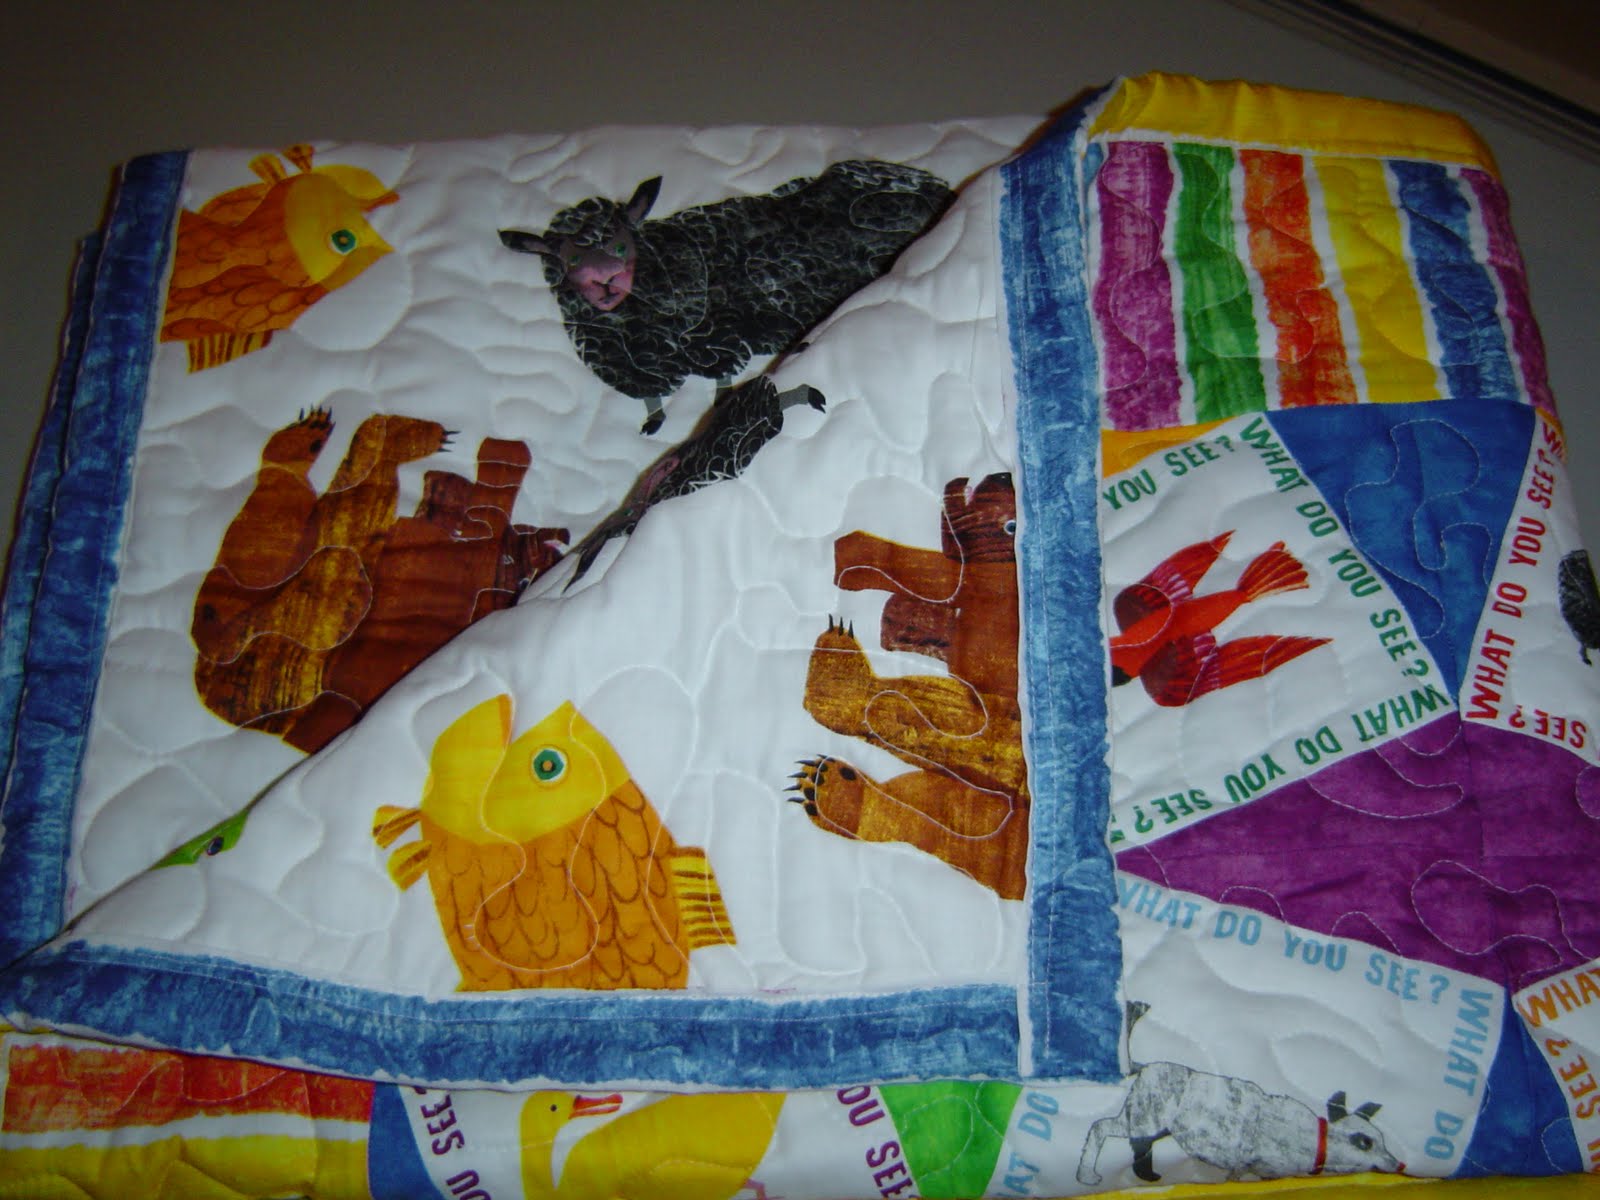
Sunday, June 19, 2011

Hopefully worth the wait...


Just like someone with an addiction that goes to a group meeting and stands up to announce the issue that brought them to that end... I too need to stand up and say.. "Hello, I'm Kim and I am scared of the double wedding ring quilt that I'm working on!"

I figure if I write it here.. I can no longer ignore it.  I have been working on a lot of different projects at a time lately.  Some out of necessity, with so many new babies in our family I have been gifting some quilts for them, but also have been doing some fun projects too.  Like many quilters even when there are no projects actively on my radar, there is that one project.. the one that keeps being put aside and picked back up whenever time permits.  In my case, that's a queen size double wedding ring that I began several months ago and I have to say has been one of the most frustrating and difficult projects I have ever decided to attempt.  I refuse to say that it has beat me.... but if it were a person, me and that quilt would NOT be on speaking terms!

This is how this project began...

I have a niece, well.. I have 7 of them, but one in particular that around late summer or fall of 2010 had visited my house for a scrap book night.  She had been discussing plans (casually) of she and her boyfriend at the time getting married.  Now, mind you, at that time they were not engaged 'officially' and no plans (that I knew of) had been made.  Or if they were she wasn't fessing up about them.  However.. knowing her as I do, the next day I started to search for fabric.  I figured that I'd have my gift all ready when the special day arrives.. or when she calls me and tells me that she just got back from whatever tropical island where she secretly got married... I'd then magically appear with a wonderful quilt to wish them well.  So that was the plan..

Choosing the fabric...

I had some strict guidelines for myself when choosing the fabric for this project.  I wanted bright but not obnoxious colors and I wanted a chance to bring into this project a concept of random placement of colors / fabrics, something that I have been terrible at so far.  I also had to feel that the fabrics 'fit' the project.  What I mean by that is traditionally this design is done with fairly muted fabrics or fabrics that somewhat seem to meld together .. so I tried to fit all three criteria into my choice.  I also wanted the fabrics to fit my niece and her soon to be husband's personality too.. be 'hip' but cozy... ya know.. all the above.  I'd also need a lot of different fabrics that all matched together as the "arc" component, which is the key component to this quilt, hosts 11 different pieced strips of fabric.

I hit the jackpot I think with a fabric family called "Fandango" created by Kate Spain for Moda fabrics.


Now, non-quilters may look at those fabrics and say.. ".. kinda funky fabric maybe for a 1970s leisure suit ... but not to much for a big quilt"  However, keep in mind when you use small strips pieced together it is the overall effect that you see...

Foundation pieced arc before the extra was trimmed off.  Paper piecing allows you to work with strips that are not cut to fussy sizes / shapes which saves time.  I saved a bit more time by buying this fabric in jelly rolls which is a roll of strips cut two and a half inches wide.  All I had to do is cut the pieces to the proper length... saved a ton of cutting time.


Choosing the pattern...

As for choosing the pattern of a double wedding ring.  Simply put, I like the history of this quilt.  I am always interested in the beginnings of quilt designs.. that is, the history of them.  A lot of the older designs have a documented meaning or a sort legend behind them.   The double wedding ring, although seemingly obvious in its meaning has some mystery within its history.  The oldest known examples go as far back as the early 1800s and then a surge of this style appear again around the time of the great depression in the late 1920s and 1930s.  The logical assumption for that resurgence, I assume, is the fact that large bolts of fabric may have been expensive and cost prohibitive.  Therefore, quilters again had to rely on scraps of fabric to complete their quilt projects.  This quilt pattern contains over 1000 small strips of fabric pieced together to form the arcs, the main component of the design.

Not fully assembled, but you can see here why I like the fabrics.. fits the bill; some bright, some muted, randomly fits together and looks like fabric that would have been used in a traditional double wedding ring.
This design also lends itself to one thing I am trying to work on in my quilts, which is random placement of fabrics.  I tend to gravitate to those designs where colors and shapes are symmetrical.  My brain simply works best that way.. although that does not make a very interesting quilt and makes the work I'm doing faily common place and boring.  This is one way I thought of to get some "random" into my work.  Of course the symbolism isn't entirely lost either, a double wedding ring which I intend to quilt in a diamond pattern.... seems like a fairly clear well wishing for a wedding.

Now the challenges..

This quilt has a lot of firsts for me.. other than this being my first DWR pattern it is also the first time I have used the process of paper/foundation piecing for the arcs.  Which leads me to the 2nd and biggest challenge.. arcs.. arcs.. arcs... this quilt has so many difficult points to match up.. the arcs have an inside, and outside.. and to machine piece those has been so difficult.  Because of that I have resigned myself to the fact that this project may have to also be the first full size queen quilt that I have to completely go over by hand.. that's right... needle.. thread.. hoop.. by hand!  Something that I have never done before and am honestly not very skilled at.... now I know the reason we see all those old photos of frontier women sitting around a quilt all quilting it by hand together .. if it were up to one lady everyone would have frozen to death!  Especially if it were up to this woman...
While doing some reading and research about this I found a quote that clearly outlines my issues with this project..

"Double Wedding Ring. The very name inspires thoughts of romance and wedlock. And certainly many of these scalloped-arc quilts have been started to celebrate impending marriages.  Although they may not have finished until the first child's appearance!"  

Exactly!!  My niece was married on January 01, 2011 and yet finishing this quilt has been so challenging.  And yes.. as the quote hints.. their first baby is due in less than 1 month!! Luckily for me his quilt has been finished already.  So, for this project I am going to use every moment of the 1 year allowed by Dear. Prudence when delivering a wedding gift... hopefully I can finish it by New Years Eve!!

Tuesday, June 14, 2011

If you can read this thank a teacher!

Just stop for a few minutes and think of all the ways teachers and your experiences in school have shaped your life, how it has impacted you.  I have certainly been influenced and molded by my memories, experiences, struggles and successes that I've had in school over the years.  The road to the person I am today has, in some way, been paved by the influence of teachers, coaches, friends and fellow classmates.  Some teachers deserve more of my reverence than others.. and you can certainly tell the ones that give their whole self to their work..

With this school year coming to an end I had been left with the thoughts of how well Jason has done in Kindergarten.  We're not ready to mail in his application to Mensa just yet, but I've observed a very socially immature little boy grow in so many ways over the last year. 

Those of you who know me know that I'm not a parent who touts my boy's strong suits only to ignore those aspects where he has room for improvement... I like to think I'm honest as to the truth about his abilities, and where he's still learning. 

Just a year or two ago he had a great deal of trouble being social, it was difficult as a parent to watch sometimes.  Even within our family he struggled to feel confident speaking with his aunts, uncles and cousins and would often cry and fuss at family events.  This year it has been nothing sort of awesome to see his personality come alive, for that special spark that he has to come through.  I am thrilled for others to finally see what I have been able to see all along.  He really is such a caring, smart, funny and creative little boy.  Of course we, as his parents, have an influence and have been trying to guide and encourage him.. but, I strongly believe that the exceptional teachers he has at his school to guide him has made all the difference.

One of the projects I have completed this week has been a gift for Jason's Kindergarten teacher, Mrs. Vorce.  One of the other mothers and I had been discussing possible gifts to present to the teacher at the end of the year / graduation celebration.  I had brought up the fact that I was thinking of a small quilt project for her and she suggested hand prints.  Sounded like a great idea and since she volunteers at the school she was kind enough to assist by sneaking the children out of the class room a few at a time in order to have each of them make a hand print and write their name for us.

She then passed the prints along to me and I scanned them into the computer and printed them with an ink jet printer onto printable cotton... Sounds familiar??? Yes.. yet another way to use printable cotton other than photographs..

The children will be presenting this to Mrs. Vorce on Thursday of this week... See more in-process photos in 'Quilt Gallery 2'

**** UPDATE **** Photos of the kids at their end of the year pizza party presenting this gift to their teacher added to 'Quilt Gallery 2'...